How to Invoice as a Freelancer: A Complete Guide

You finished the work, delivered it on time, and your client is happy. Now you need to get paid. Yet roughly 74% of freelancers deal with late payments at some point in their careers. The difference between freelancers who get paid on time and those who chase payments for weeks often comes down to one thing: how they invoice.
Knowing how to invoice as a freelancer is not just about sending a payment request. Your invoice is a business document that reflects your professionalism, protects you legally, and sets expectations for when and how you get paid. This guide walks you through everything you need to build a freelance invoicing process that works.
Why a Solid Invoicing Process Matters
Freelancers wear many hats, and invoicing is one of the least exciting parts of the job. But skipping steps or sending vague invoices costs real money.
A clear invoice reduces back-and-forth. When your client's accounting team can process your invoice without questions, payments go through faster. Invoices with itemized descriptions and explicit due dates get paid significantly quicker than vague, lump-sum requests.
Beyond speed, your invoicing process protects you. If a client disputes a charge six months from now, your numbered, dated invoices with detailed line items are your proof of what was agreed, delivered, and owed.
Think of your invoice as the final handshake on every project. It signals that you run a real business, not a side hobby.
What to Include on Every Freelance Invoice
A professional freelance invoice needs these elements every single time:
Your business information. Include your full name (or business name), address, email, and phone number. Use the same details that appear on your contracts and tax forms.
Client information. Add the client's business name, contact person, and billing address. For larger companies, confirm the correct department to avoid your invoice getting lost internally.
A unique invoice number. Start with a simple sequential system like INV-001, INV-002, INV-003. This helps both you and your client track payments and reference specific invoices during conversations.
Invoice date and due date. The invoice date is when you send it. The due date is when payment is expected. Be specific — write "Due by April 15, 2026" instead of "Due upon receipt."
Itemized description of services. Break down what you did, when you did it, and at what rate. Instead of "Web design — $3,000," write:
- Homepage design (8 hours x $150/hour) — $1,200
- About page design (4 hours x $150/hour) — $600
- Mobile responsive adjustments (4 hours x $150/hour) — $600
- Two rounds of revisions (4 hours x $150/hour) — $600
This level of detail prevents disputes and shows clients exactly where their money went.
Payment terms and methods. State your terms clearly: "Net 14 — payment due within 14 days of invoice date." List the payment methods you accept, whether that is bank transfer, PayPal, Stripe, or another platform. Include direct links or account details so the client can pay without extra steps. Not sure which payment terms like Net 30 work best for your situation? The right choice depends on your cash flow needs and client type.
Late payment policy. A simple line like "A 2% monthly late fee applies to overdue balances" discourages delays. Freelancers who include late fee policies on their invoices report fewer overdue payments, even when they rarely enforce the fee.

How to Set Up Your Freelance Invoicing Workflow
Having the right elements on your invoice is only half the battle. You need a repeatable system so invoicing never falls through the cracks.
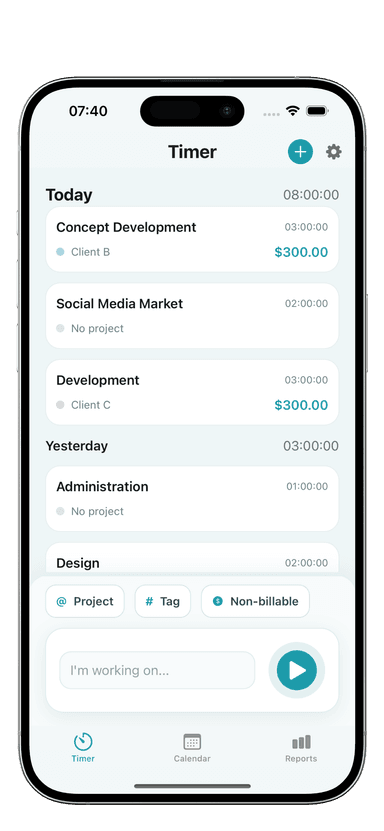
Step 1: Track your time as you work. If you bill hourly, real-time tracking eliminates the guesswork that leads to underbilling. Even for fixed-price projects, tracking hours helps you understand your effective hourly rate and price future work more accurately. A tool like Toggle Time Tracker makes this simple — tap to start, tap to stop, and your hours are logged by project.
Step 2: Invoice promptly after delivery. Send your invoice within 24-48 hours of completing the work. The project is fresh in your client's mind, and they are more likely to approve and pay quickly. Waiting two weeks to invoice trains clients to deprioritize your payment.
Step 3: Use a consistent template. Create one template that includes all the elements from the section above, then reuse it for every client. Consistency makes your invoices recognizable and reduces the chance of forgetting a required field. See our complete breakdown of what to include in a freelance invoice template to make sure your template covers all 10 required elements. If you're building from zero, our guide on creating a freelance invoice from scratch walks you through every step.
Step 4: Send as PDF via email. Export your invoice as a PDF before sending. PDFs look professional on any device, cannot be accidentally edited, and are easy for clients to file. Include the invoice number in your email subject line for easy reference.
Step 5: Log every invoice. Maintain a simple spreadsheet or use your invoicing tool to track invoice numbers, amounts, dates sent, and payment status. This becomes essential at tax time and when following up on overdue payments.
When you track your billable hours accurately, your invoices practically write themselves. Each line item comes directly from your time logs, so there is no guessing and no forgotten work.

Common Freelance Invoicing Mistakes to Avoid
Even experienced freelancers make invoicing errors that slow down payments:
Invoicing late. The longer you wait to send an invoice, the longer you wait to get paid. Make invoicing part of your project completion checklist, not an afterthought.
Using vague descriptions. "Consulting services — $2,000" invites questions. Itemize your work so clients know exactly what they are paying for.
Forgetting payment terms. If your invoice does not state when payment is due, the client has no deadline. Always include a specific due date.
Not numbering invoices. Without unique invoice numbers, tracking payments and handling tax records becomes chaotic. Start numbering from your first invoice and never skip.
Ignoring non-billable time in your rate. Admin work, invoicing, marketing — none of that is billable, but it takes real time. If you spend 10 hours a week on non-billable tasks, your effective rate is lower than you think. Understanding the difference between billable and non-billable hours helps you set rates that account for this overhead.
Not matching invoices to contracts. Your invoice should reflect what was agreed in your contract or proposal. Mismatched terms are the fastest way to trigger a payment dispute.
How to Handle Late Payments and Follow-Ups
No matter how professional your invoicing process is, some clients will pay late. Having a system for follow-ups keeps you in control without damaging relationships.
Day 1 after due date. Send a brief, polite email reminder. Keep the tone neutral — sometimes invoices simply get lost in a busy inbox. Include the invoice number and amount for easy reference.
Week 2. Follow up again, this time by phone or a direct message if email is not getting a response. Ask if there are any issues with the invoice and offer to resend it.
Week 4. Send a formal past-due notice referencing your late fee policy. At this point, consider pausing any ongoing work until the balance is settled.
Beyond 30 days. For significant amounts, consider mediation services or a collections agency as a last resort. Document every communication in case you need it later.
The best way to prevent late payments is to set expectations before work begins. Include payment terms in your contract, request deposits on larger projects (25-50% upfront is common), and establish a track record of prompt invoicing. For a deeper dive into this topic, read our guide on getting clients to pay on time.
Knowing your true hourly rate makes these conversations easier. When you can show a client that a $5,000 invoice represents 40 hours of detailed work, the amount feels justified and disputes are less likely.

Turn Tracked Hours into Professional Invoices
The freelancers who get paid fastest are the ones who remove friction from the entire billing cycle. That starts with tracking your time and ends with a clear, professional invoice.
Here is the cycle that works:
- Track hours in real time as you work on each project
- Review your time logs at project completion
- Create an itemized invoice from your tracked data
- Send promptly as a PDF with clear payment terms
- Follow up systematically if payment is late
Toggle Time Tracker helps you build this cycle. Track hours by project with a single tap, then export your time data to create accurate, detailed invoices. Your time logs become the foundation for every invoice line item, so nothing gets missed and every hour is accounted for.
Stop guessing what to bill. Start tracking your time, build a consistent invoicing process, and get paid what you earned.
Download Toggle Time Tracker and turn your tracked hours into professional invoices.