How to Onboard Freelance Clients the Right Way
You just landed a new client. The temptation is to dive straight into the work, but skipping the freelance client onboarding process is one of the fastest ways to create problems you'll spend weeks untangling. Unclear expectations, payment disputes, and endless revision requests almost always trace back to a weak start.
Research from the Project Management Institute shows that 39% of projects fail due to inaccurate requirements gathering. For freelancers, that failure starts in the first 48 hours. A structured onboarding process takes 1-3 days to complete, but it saves you dozens of hours in miscommunication down the road.
Why a Client Onboarding Process Matters for Freelancers
When you're managing multiple freelance clients, consistency is everything. You can't afford to wing the first week with each new client and hope things work out.
A repeatable onboarding workflow does three things:
- Sets expectations before work begins. Your client knows what you'll deliver, when you'll deliver it, and what they need to provide. No guessing.
- Builds trust immediately. When a client receives a welcome message, a contract, and a clear timeline within 48 hours of saying yes, they feel confident they hired a professional.
- Protects your income. A signed contract with defined scope, payment terms, and revision limits means you're not doing free work or chasing late payments.
Freelancers who onboard clients systematically report fewer disputes, faster payments, and more repeat business. The upfront investment is small compared to the hours you'll lose handling a project that went sideways because nobody defined the rules.

What to Include in Your Freelance Client Onboarding Checklist
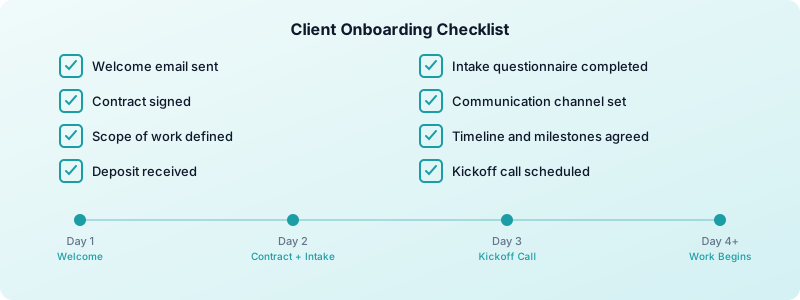
Every client engagement is different, but your onboarding checklist should cover the same core items every time. Here's what belongs on it:
1. Welcome message. Send a brief, professional email thanking the client for choosing you. Include a summary of what happens next and when they can expect each step. This sets the tone.
2. Contract and scope of work. Define exactly what you'll deliver, the timeline, revision limits, and what falls outside scope. This is your best defense against scope creep. Be specific — "3 blog posts of 1,500 words each" is better than "content creation."
3. Payment terms and deposit. Specify your rates, payment schedule, and late-payment policy. A standard approach is 50% upfront before any work begins, with the remaining 50% due on delivery. For more on structuring your freelance invoicing process, build this into your template.
4. Client intake questionnaire. Ask targeted questions about their brand voice, target audience, competitors, goals, and any existing assets you'll need access to. A good intake form saves you from back-and-forth emails later.
5. Communication plan. Define which tools you'll use (email, Slack, project board), expected response times, and how often you'll send progress updates. One channel for project communication prevents messages from getting lost.
6. Project timeline and milestones. Break the project into phases with clear deadlines. Milestones give both you and the client checkpoints to confirm things are on track.
7. Kickoff meeting. Schedule a 30-minute call to walk through the scope, answer questions, and confirm priorities. This meeting often surfaces requirements that didn't come up in writing.
A welcome packet does much of this work for you, once. What to include in a freelance welcome packet lists what belongs in it.
How to Set Up Your Onboarding Workflow Step by Step
Building an onboarding workflow doesn't require expensive tools. Start simple and iterate as you learn what works.
Step 1: Create your templates. Write a reusable welcome email, contract, intake questionnaire, and invoice template. You'll customize these for each client, but the structure stays the same. Most freelancers can build all four in an afternoon.
Step 2: Define your sequence. Map out the order: welcome email on day one, contract and intake form on day two, kickoff call on day three. Having a sequence means you never forget a step, even when you're juggling multiple projects.
Step 3: Set a payment gate. Make it a rule: no work starts until the contract is signed and the deposit is received. This protects your time and filters out clients who aren't serious.
Step 4: Automate what you can. Use email templates for your welcome message and follow-ups. Save your intake questionnaire as a reusable form. The less manual effort per client, the more time you spend on billable work.
Step 5: Document everything. Keep a folder for each client with their signed contract, intake responses, project brief, and communication history. When a question comes up three months later, you'll know exactly where to find the answer.
Common Client Onboarding Mistakes Freelancers Make
Even experienced freelancers fall into these traps:
Starting work before the contract is signed. It feels harmless — "I'll just get a head start while they review the contract." But if the deal falls through or the scope changes, you've done unpaid work with no legal protection.
Skipping the intake questionnaire. You think you understand the project from the initial conversation. Then two weeks in, you discover the client's expectations were completely different from what you assumed. A structured questionnaire catches these misalignments on day one.
Being too flexible on scope. Wanting to impress a new client is natural, but saying yes to every request without updating the contract leads to creep. Define boundaries early and use a change-request process for anything outside the original scope.
Not discussing communication preferences. Some clients expect daily updates. Others want to hear from you only at milestones. If you don't ask, you'll either annoy them with too many messages or worry them with silence.
Overcomplicating the process. If your onboarding has 15 steps and requires three different apps, you'll burn out on it by your fifth client. Start with the basics — contract, payment, intake form, kickoff call — and add steps only when you feel a gap.
How Time Tracking Fits Into Your Onboarding Process
Time tracking isn't just for billing. When you integrate it into your onboarding from day one, you gain visibility that protects both you and your client.
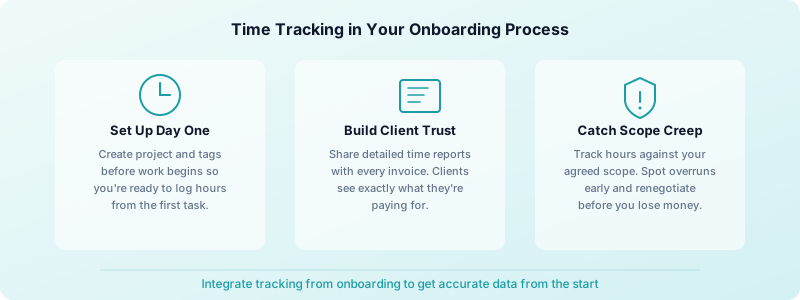
Set up project tracking before the kickoff call. Create a project in your time tracker with the client's name and any relevant tags. When work begins, you're ready to log hours immediately instead of scrambling to organize entries later.
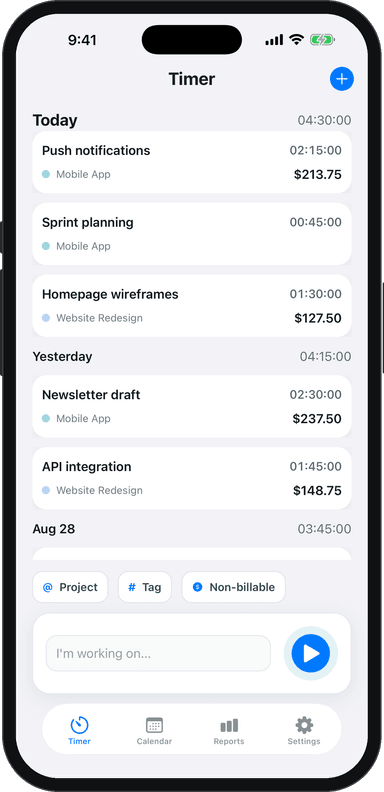
Share your tracking approach with the client. During onboarding, mention that you track all project time and can provide detailed reports. Clients appreciate transparency, and it reinforces that you're billing accurately. Toggle Time Tracker lets you organize entries by project and export clean PDF or Excel reports — no manual formatting needed.
Use time data to validate your estimates. After a few projects, your tracked hours become a database of real estimates. You'll know that a typical blog post takes 4 hours, a website redesign takes 40, and client communication adds 15-20% on top of production time. These numbers make your future proposals more accurate and your pricing more confident.
Catch scope creep early. When you're tracking time against a defined scope, you'll notice immediately when a project is running over. That's your signal to have a conversation with the client about additional work — before you've absorbed hours of unpaid effort.
Start Every Project on Solid Ground
A freelance client onboarding process doesn't need to be complicated. A welcome message, a clear contract, a payment gate, an intake form, and a kickoff call cover 90% of what you need. Build it once, reuse it for every client, and refine it as you go.
The freelancers who get paid consistently, avoid disputes, and build long-term client relationships are the ones who invest in the first few days of every engagement.
Download Toggle Time Tracker and set up project-based tracking from day one of your next client engagement. It's free to start, works offline, and keeps your data private on your device.